Unlock the Magic of Homemade Caramel: Rich, Creamy & Ready in 15 Minutes!
Imagine a cascade of golden, luscious caramel, glistening over a scoop of vanilla bean ice cream, mingling with the tartness of apple pie, or swirling into your morning coffee for a decadent treat. What if we told you that this dreamy delight, a culinary marvel often perceived as complex, can be whipped up in your kitchen in just about 15 minutes? Yes, you read that right! Forget the intimidation, the candy thermometers, and the fear of burnt sugar. This comprehensive guide to a truly foolproof
caramel sauce recipe will transform your perception and elevate your dessert game.
Homemade caramel sauce offers a depth of flavor and a silky texture that store-bought versions simply can't match. It's an ingredient that tastes distinctly of love and craftsmanship, yet requires surprisingly little effort once you know the secret – and we're about to share it with you. Whether you're a seasoned baker or a kitchen novice, prepare to master the art of rich, creamy caramel, perfect for any dessert, and all within a quarter of an hour.
The Secret to Silky Smooth Caramel: Embracing the Wet Method
For many, the mere mention of making caramel conjures images of scorched sugar, sticky messes, and frustrating crystallization. In culinary schools, making caramel can even be a rite of passage, often fraught with potential pitfalls. These common struggles usually stem from the traditional "dry" caramel approach, where sugar is melted alone in a pan. While possible, this method is unforgiving. The sugar heats unevenly, prone to burning in spots while other areas remain solid, and the risk of crystallization (where the sugar seizes and becomes grainy) is remarkably high.
Fortunately, there's a vastly superior and significantly more foolproof technique: the "wet" caramel method. This is our secret weapon for achieving consistent, velvety smooth results every single time. Instead of just sugar, you begin by melting the sugar with a small amount of water. Here’s why this simple addition makes all the difference:
* **Even Heating:** The water dissolves the sugar first, creating a syrup. As this syrup heats, the water prevents the sugar from burning too quickly and ensures a more even temperature distribution throughout the mixture.
* **Reduced Crystallization:** The water acts as a barrier, minimizing the chances of sugar crystals reforming. These rogue crystals are often introduced by tiny impurities or even just by stirring prematurely, leading to a grainy texture. The wet method helps dissolve any potential crystals and keeps them dissolved.
* **Evaporation Magic:** Don't worry about diluting your caramel! As the mixture heats, the water evaporates, leaving behind pure, beautifully caramelized sugar. It has no bearing on the final texture, only on the journey to get there.
By embracing the wet method, you effectively take the stress out of caramel making, allowing you to focus on the glorious transformation of clear liquid into golden perfection. For an even deeper dive into this transformative technique, check out our detailed guide:
Master Smooth Caramel Sauce: The Wet Method to Avoid Graininess.
Essential Tools for Your Caramel Journey (And Why They Matter)
While the wet method significantly simplifies the process, having the right equipment is still crucial for success. Think of it as laying the groundwork for a smooth operation.
1.
The Right Pan is Paramount: This is arguably the most critical piece of equipment.
*
Heavy-Bottomed: A heavy-bottomed saucepan is non-negotiable. It conducts and retains heat far more evenly than thin-bottomed pans, preventing hot spots that can cause sugar to burn in patches. This is where many dry caramel attempts go wrong, leading to unevenly heated, bitter sugar.
*
Tall-Sided: As the sugar mixture boils and bubbles, it can expand quite a bit. Tall sides prevent boil-overs and hot sugar splatters, which are not only messy but potentially dangerous.
*
Appropriate Size: We recommend a minimum of a 3-quart pan, though a more common 4-quart saucepan offers even more safety margin. Using a pan that’s too small is a recipe for disaster.
*
Cleanliness: Start with an impeccably clean pan. Any specks of food or residue can act as nucleation sites for crystallization, undoing all the benefits of the wet method.
2.
Heat-Resistant Rubber Spatula: Once the sugar is caramelized, you’ll be incorporating cream. A heat-resistant rubber spatula is ideal for stirring consistently, scraping down the sides to ensure everything is well combined, and getting into all the edges. Plus, it’s a breeze to clean. Avoid wooden spoons as they can sometimes harbor flavors or small particles that could promote crystallization.
3.
Measuring Cups and Spoons: While it sounds obvious, having all your ingredients pre-measured and ready before you start is vital. The caramelizing process happens quickly, and you won’t have time to scramble for your heavy cream once the sugar hits its perfect color.
4.
Pastry Brush (Optional but Recommended): A small pastry brush dipped in water can be used to gently brush down any sugar crystals that form on the sides of the pan during the boiling process. This further ensures a smooth, non-grainy caramel.
Preparation is key. Gather all your ingredients and equipment, measure everything out, and have it within arm's reach. This mise en place will allow you to react quickly and confidently as your caramel undergoes its magical transformation.
Your 15-Minute Path to Perfect Caramel: A Step-by-Step Guide
Making caramel sauce involves two distinct, yet interconnected, stages: caramelizing the sugar and then incorporating the cream. With the wet method and our practical tips, you'll sail through it.
Stage 1: The Golden Transformation (Caramelizing the Sugar)
This is where the magic truly happens, as simple sugar turns into a complex, amber-hued syrup.
1.
Combine Sugar and Water: In your chosen heavy-bottomed, tall-sided saucepan, combine your granulated sugar and water. Stir gently with your spatula just until the sugar is moistened. Do not stir excessively once heating begins, as this can encourage crystallization.
2.
Bring to a Boil: Place the saucepan over medium-high heat. Allow the mixture to come to a rolling boil. During this phase, you might see some sugar crystals clinging to the sides of the pan. If so, use your damp pastry brush to gently wash them down into the boiling syrup.
3.
Watch for Color (No Thermometer Needed!): This is the crucial part where visual cues replace a candy thermometer. Continue boiling without stirring. The water will evaporate, and the sugar will begin to color.
* Initially, it will be clear.
* Then, it will turn a pale straw yellow.
* Continue watching as it progresses to a golden hue, then a rich amber, and finally a deep copper or mahogany color.
*
Be attentive! The transition from perfect caramel to burnt, bitter caramel happens incredibly fast at the end. Aim for a deep amber – the color of an old penny. Too pale, and it won't have deep caramel flavor; too dark, and it will taste burnt.
Stage 2: The Creamy Emulsion (Incorporating the Cream)
Once your sugar has reached that beautiful, deep amber, it’s time to stop the cooking process and create the creamy sauce.
1.
Ready the Cream: Have your room-temperature heavy cream already measured out and nearby. Using room-temperature cream is vital as cold cream can cause the hot sugar to seize up and solidify, making it difficult to achieve a smooth sauce.
2.
Slow and Steady Wins the Race: Remove the pan from the heat. Carefully, yet continuously, stream the room-temperature heavy cream into the hot sugar mixture while stirring consistently with your heat-resistant rubber spatula.
*
Expect a dramatic reaction! The mixture will bubble up vigorously and release a lot of steam. This is normal and precisely why a tall-sided pan is so important. Keep stirring.
* The consistent stirring helps to quickly cool the sugar and emulsify the cream, ensuring a perfectly smooth, luscious caramel.
3.
Add Butter & Salt (Optional but Recommended): Once all the cream is incorporated and the bubbling has subsided, you can stir in butter (if using) and a pinch of salt. The butter adds extra richness and gloss, while a touch of salt perfectly balances the sweetness, transforming it into a divine salted caramel.
4.
Cool and Thicken: Allow the caramel sauce to cool in the pan for a few minutes before transferring it to a jar or serving. It will be quite thin when hot, but as it cools, it will thicken to that perfect drizzly consistency.
For an even more detailed walkthrough and troubleshooting tips on this method, be sure to read our article:
Foolproof Homemade Caramel Sauce: No Thermometer Needed.
Beyond the Drizzle: Creative Ways to Enjoy Your Homemade Caramel
Now that you've mastered the art of making this exquisite
caramel sauce recipe, the possibilities are endless! Its versatility makes it a perfect accompaniment for a myriad of sweet (and even some savory!) dishes.
*
Classic Desserts: Drizzle generously over vanilla ice cream, apple pie, cheesecake, brownies, or bread pudding. It transforms any simple dessert into an extraordinary indulgence.
*
Beverage Booster: Swirl a spoonful into your morning coffee, hot chocolate, or a milkshake for a gourmet touch.
*
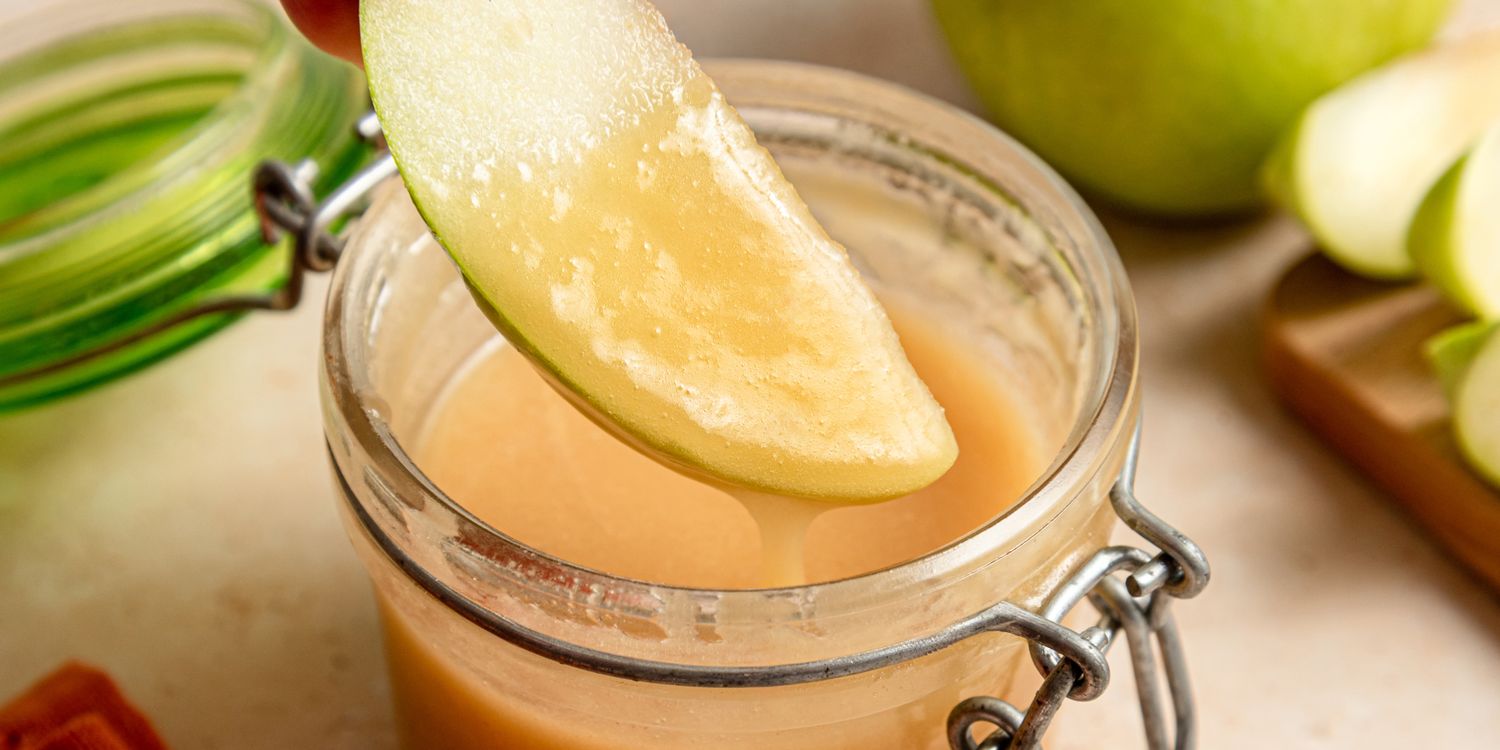
Fruity Delights: Serve as a dipping sauce for apple slices, pear wedges, or banana chunks.
*
Breakfast & Brunch: Elevate pancakes, waffles, or French toast with a generous pour.
*
Savory Surprises: While often associated with sweets, a touch of salted caramel can be fantastic with roasted pork or chicken, adding a beautiful glaze and depth of flavor. You can also mix it into savory glazes for root vegetables.
*
Flavor Variations: Don't stop at plain caramel! Infuse it with vanilla extract, a pinch of cinnamon, a splash of bourbon, or a hint of orange zest for exciting twists.
It's important to note, however, that while incredibly versatile, this particular homemade caramel sauce recipe is designed for drizzling and dipping. Its rich, smooth texture means it's generally too thin to set up as a hard candy shell, making it unsuitable for traditional candy apples. For that, you'd need a much thicker, more robust caramel formulation.
Storage Tip: Your homemade caramel sauce can be stored in an airtight container in the refrigerator for up to 2-3 weeks. If it thickens too much in the fridge, simply warm it gently in the microwave in 15-second intervals or in a saucepan over low heat until it reaches your desired consistency.
Indulge in Homemade Excellence
No longer a daunting task for professional pastry chefs, homemade caramel sauce is within reach for anyone with a heavy-bottomed pan and 15 minutes to spare. This
caramel sauce recipe, utilizing the superior wet method and relying on visual cues rather than fancy equipment, promises a result that is rich, creamy, and deeply flavorful. It's an ingredient that adds a touch of gourmet magic to virtually any dish, proving that the most decadent treats can often be the simplest to make from scratch. So go ahead, conquer your caramel fears, and unleash a world of golden, luscious possibilities in your kitchen!